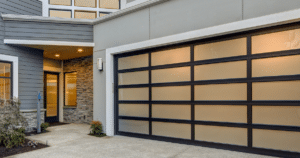
Garage door sensors play a crucial role in the safety and functionality of your garage door system. These sensors ensure the door operates smoothly and prevent accidents by detecting obstacles in its path. However, over time, garage door sensors can become faulty due to wear and tear, exposure to the elements, or electrical issues. Addressing a faulty garage door sensor promptly is essential to maintain the safety and reliability of your new garage door.
If you live in Mission, Viejo, CA, and are facing problems with your garage door sensor, this guide is here to help. From identifying the signs of a malfunctioning sensor to step-by-step replacement instructions, we’ll provide you with everything you need to know. Additionally, we’ll share expert tips and tricks to make the process easier and stress-free.
Why Garage Door Sensors are Important
The Role of Garage Door Sensors
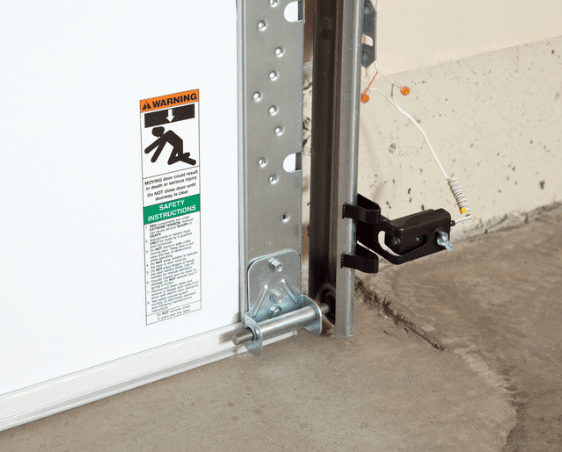
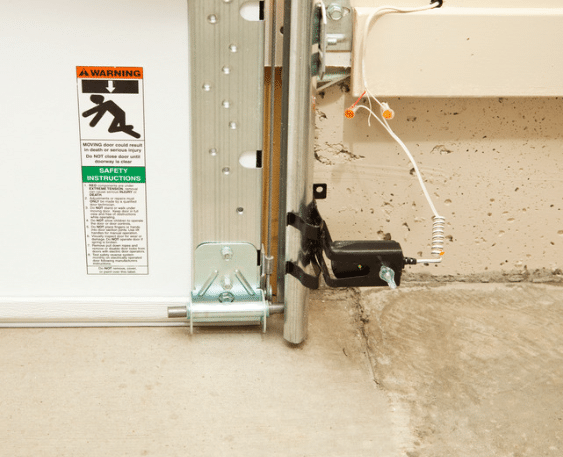
Garage door sensors play a crucial role in maintaining safety and convenience for homeowners. As safety devices, these sensors are designed to prevent accidents and ensure that your garage door operates smoothly and efficiently. Positioned near the bottom of the door tracks, they utilize infrared beams to detect obstructions in the door’s path. If the beam is interrupted, the garage door will not close, effectively preventing potential damage to property or injury to people or pets. By incorporating this technology, garage door systems adhere to modern safety standards and provide peace of mind.
Beyond safety, sensors contribute to the functionality and reliability of the garage door system. They act as a first line of defense against mishaps, ensuring that even minor obstructions do not result in significant repairs or safety hazards. This dual role of safety and functionality highlights their indispensable nature in any garage door setup.
Common Causes of Faulty Sensors
Despite their importance, garage door sensors can occasionally malfunction. Understanding the common causes of these issues can help you address problems promptly and effectively. Here are some typical reasons for sensor failure:
- Dirt or Debris Blocking the Sensors: Over time, sensors can accumulate dust, dirt, or cobwebs, which may block the infrared beam. Regular cleaning can prevent this problem and ensure uninterrupted operation.
- Misalignment Due to Impact or Vibrations: Sensors need to be perfectly aligned to function correctly. Impacts, such as accidental bumps or consistent vibrations from daily use ,can cause misalignment. Periodic checks can help identify and rectify this issue.
- Electrical Issues: Faulty wiring, frayed cables, or power surges can disrupt the operation of garage door sensors. Inspecting the electrical components and ensuring proper insulation can mitigate these problems.
- Corrosion Caused by Moisture or Environmental Factors: Exposure to moisture, humidity, or extreme weather conditions can lead to rust and corrosion of the sensor components. Protective measures, like weatherproofing, can extend the lifespan of your sensors.
Understanding these common issues can help you troubleshoot and determine whether replacement is necessary.
Signs Your Garage Door Sensor Needs Replacement
Symptoms of a Malfunctioning Sensor
Garage door sensors play a critical role in ensuring the safety and functionality of your new garage door. Recognizing the symptoms of a malfunctioning sensor early can save you time, money, and potential safety hazards. Look out for the following symptoms:
- The Garage Door Won’t Close
- The most common and noticeable symptom of a sensor problem. If the door begins to close but reverses direction, it indicates that the sensors may not be detecting a clear path.
- Flashing Indicator Lights
- Most garage door sensors have indicator lights that should remain steady when functioning correctly. A blinking or flashing light often signals issues with sensor alignment, dirt buildup, or wiring faults.
- Intermittent Operation
- If the garage door operates inconsistently, it could mean the sensors are losing connection or facing interference. Loose wiring or slight misalignment might cause this problem.
- Unusual Noises
- Clicking or grinding sounds when the garage door operates might not directly point to the sensors but can often indicate that they are struggling to relay signals properly due to mechanical stress.
When to Replace vs. Repair
Repair the Sensors If:
- Misalignment is the Issue:
- Adjust the sensors to ensure they are correctly aligned. They typically need to face each other directly and be positioned at the same height.
- Dirt or Debris is Blocking the Beam:
- Clean the sensor lenses with a soft, dry cloth to remove dust, cobwebs, or grime.
- Loose Connections:
- Check and secure any loose wires or connectors.
Replace the Sensors If:
- Physical Damage is Evident:
- Cracked, broken, or visibly damaged sensors often need replacement, as repairs might not restore full functionality.
- Wiring is Compromised:
- Severed or heavily corroded wiring can make replacement a more viable solution than repair.
- Sensors are Obsolete:
- If the sensors are outdated and incompatible with modern systems, upgrading to new sensors is recommended for improved safety and performance.
Tools and Materials Needed for Replacement
Essential Tools
To replace a faulty garage door sensor, gather the following tools:
- Screwdrivers (flathead and Phillips)
- Adjustable wrench
- Electrical tape
- Wire stripper
- Level
Replacement Sensors
Ensure you purchase the correct replacement sensors that are compatible with your garage door opener. Consult your owner’s manual or contact the manufacturer for guidance.
Step-by-Step Guide to Replacing Garage Door Sensors

Preparation
Disconnect the Power
- Safety first! Unplug the garage door opener or switch off the circuit breaker, controlling the garage door to eliminate the risk of electrical shock.
- Confirm that the power is off by attempting to use the garage door opener. It should not respond.
Open the Garage Door Manually
- Release the garage door from the opener by pulling the manual release cord.
- Carefully lift the garage door to its open position and secure it in place with clamps or locking pliers on the tracks to prevent it from accidentally closing.
Removing the Old Sensors
- Locate the Sensors
- Garage door sensors are typically installed on both sides of the garage door, mounted on brackets near the bottom of the door tracks.
- Identify the sensors; each will have an indicator light that helps in alignment.
- Disconnect the Wiring
- Carefully examine the wires connecting the sensors to the garage door opener system.
- Take note of the wire colors or markings, as these will guide you when connecting the new sensors.
- Using wire cutters, gently detach the wires from the old sensors. Avoid damaging the wires if you plan to reuse them.
- Remove the Sensors from Their Brackets
- Use a screwdriver to unscrew the sensors from their brackets.
- Keep the screws in a safe place in case you need them for the new sensors.
- Gently slide the sensors off the brackets and set them aside.
Installing the New Sensors
- Mount the New Sensors
- Position the new sensors onto the existing brackets.
- Secure them using the screws you removed earlier or the hardware provided with the replacement sensors.
- Ensure they are firmly attached, but avoid overtightening, as this may damage the brackets.
- Connect the Wiring
- Match the wires from the new sensors to the corresponding wires leading to the opener system. Use the color coding or markings noted earlier.
- Twist the wires together and secure the connections using electrical tape or wire connectors to ensure they are insulated and stable.
- Double-check each connection for a snug fit.
- Align the Sensors
- Use a level to make sure both sensors are perfectly aligned. They should face each other directly, and their indicator lights should be visible.
- Misalignment is a common reason for sensor malfunction, so take your time to ensure accuracy.
- Some sensors may have alignment guides or indicators to help you position them correctly.
- Test the Sensors
- Reconnect the power to the garage door opener.
- Check the indicator lights on the sensors:
- A steady light on both sensors indicates proper alignment.
- Flashing lights mean the sensors are misaligned or obstructed.
Final Checks
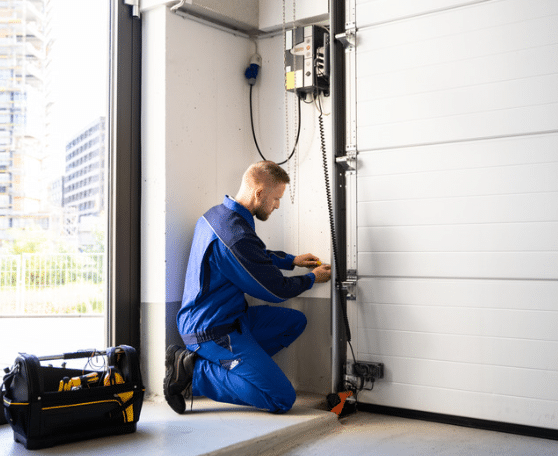
- Operate the Garage Door
- Use the opener to test the garage door. It should close smoothly without reversing.
- Interrupt the sensor beam with an object (e.g., a broomstick) while the door is closing to ensure the safety mechanism works correctly. The door should immediately reverse.
- Inspect the Wiring and Alignment
- If the garage door doesn’t operate as expected, revisit the wiring connections and realign the sensors using the level.
- Look for any obstructions or dirt on the sensor lenses that could interfere with the operation.
- Perform Multiple Tests
- Open and close the garage door several times to confirm consistent functionality.
- Listen for unusual noises or signs of strain that could indicate a problem with the installation.
Tips and Tricks for a Smooth Replacement Process
Maintain Clean Sensors
Over time, sensors can accumulate dirt and debris, which may obstruct their functionality and accuracy. Regularly clean these sensors with a soft, lint-free cloth to avoid malfunctions and ensure optimal performance. Be gentle to avoid any damage to the sensitive parts. If necessary, use a mild cleaner that is safe for electronics, but make sure it does not leave any residue that could attract more dirt.
Use High-Quality Replacements
When replacing any parts of your garage door system, especially the sensors, it’s crucial to choose high-quality, durable replacements that are guaranteed to be compatible with your specific system. This not only ensures the longevity of the sensors but also their reliability and effectiveness. It’s worth investing a bit more in premium products to save on future maintenance and replacement costs. Be wary of generic or low-cost alternatives that might not meet the operational standards of your system.
Seek Professional Assistance
While some maintenance tasks can be done on a DIY basis, sensor replacement or any major repairs might require professional expertise, especially if you encounter complex issues or are unsure about the technical aspects. A professional garage door technician has the tools, knowledge, and experience to diagnose issues accurately and provide the necessary repairs or replacements efficiently. This approach helps in mitigating the risk of improper installation, which can lead to further complications or even safety hazards.
FAQs About Garage Door Sensors
1. How do I know if my garage door sensor is faulty?
If your garage door refuses to close properly, frequently stops or reverses before hitting the ground, or if the sensor’s indicator lights flash or remain off when they should be on, these are common signs of a faulty sensor. Inconsistent operation often suggests sensor issues that require attention.
2. Can I repair a garage door sensor myself?
Yes, some problems with garage door sensors can be fixed yourself. Common issues such as misalignment or dirt accumulation can be resolved by realigning the sensors or cleaning them with a soft cloth. However, if the sensors are physically damaged or fail to work after troubleshooting, replacing them might be necessary.
3. How much does it cost to replace a garage door sensor?
The expense of replacing garage door sensors can vary widely based on factors such as the make and model of the sensor and the rates of the technician performing the installation. Typically, you can expect to spend between $50 to $150 on parts and an additional $100 to $200 for professional installation services.
4. Are garage door sensors universal?
Garage door sensors are not universally interchangeable. To ensure proper operation and compatibility, check your garage door opener’s manual or contact the manufacturer directly. Using the correct sensors as specified by the manufacturer helps prevent operational issues.
5. How long do garage door sensors last?
Garage door sensors generally last up to 10 years, provided they are maintained properly. Their lifespan can be affected by various environmental factors such as dust, moisture, and extreme temperatures. Regular cleaning and proper alignment can help extend their useful life.
Conclusion
Replacing a faulty garage door sensor is a manageable task that ensures the safety and efficiency of your garage door system. By following this guide, you can troubleshoot, replace, and maintain your sensors with confidence. For homeowners in Mission Viejo, CA, addressing sensor issues promptly can prevent accidents and enhance the longevity of your garage door.
When in doubt, trust the experts. Royale Garage Door Service Inc. offers professional garage door repair and replacement services to keep your system running smoothly.
End Note
Royale Garage Door Service Inc. is your trusted partner for reliable garage door repair services in Orange County. Our team of experts is dedicated to ensuring the safety and functionality of your garage door. Whether you need help with faulty sensors or a complete system overhaul, we’re here to help.
Visit us to learn more about our garage door services and explore our special offers. Check out our customer testimonials and view our gallery for examples of our work. Contact us today via our contact form or get a quote for your garage door needs. Don’t forget to follow us on Facebook for updates and tips!

