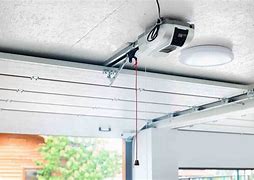
A garage door spring is a vital component that counterbalances the weight of the garage door, making it easier to open and close. Over time, these springs endure significant tension and eventually wear out or break, leaving your garage door inoperable. While replacing a garage door spring might seem like a job for the pros, it is possible to do it yourself with the right tools, safety precautions, and step-by-step instructions. Learning how to replace garage door spring on your own can save you a significant amount of cash and avoid the inconvenience of waiting for a professional.
However, before you begin, it is important to understand that garage door springs are under high tension. This means that replacing them requires attention to detail and adherence to safety procedures to avoid injury. In this guide, we’ll walk you through the necessary steps for replacing a garage door spring safely and efficiently. We’ll cover everything from gathering the right tools to properly winding the new spring so you can get your garage door back in working order.

Understanding Garage Door Springs
Before diving into the replacement process, it is crucial to identify which type of garage door spring your door uses. There are two main types of garage door springs: torsion springs and extension springs. The replacement process varies depending on the type, so knowing which one you have is the first step.
Torsion Springs
Torsion springs are mounted horizontally above the garage door opening. They use torque to lift and lower the garage door smoothly. Torsion springs are more common in modern garage doors due to their durability and balanced operation. They come in various sizes and strengths, depending on the door’s weight and size.
Extension Springs
Extension springs run along the sides of the garage door track. When the door is closed, these springs stretch, storing tension that helps lift the door when it opens. Extension springs are generally found in older garage doors or those with limited headroom. They typically come in pairs and work in tandem to balance the door’s weight.
Safety First: Precautions Before Replacing Garage Door Springs
Replacing a garage door spring can be dangerous due to the tension in the springs. Safety should always be your top priority. Here are some key precautions to follow before you start:
- Disconnect the Garage Door Opener: This prevents the door from accidentally being activated while you’re working on it.
- Secure the Garage Door: If the door is stuck in a partially open position, use C-clamps or locking pliers on the garage tracks to hold it in place.
- Wear Safety Gear: Always wear safety glasses and gloves to protect your eyes and hands.
- Use the Correct Tools: Never substitute tools. Use winding bars specifically designed for adjusting torsion springs.
Tools You Will Need
To replace a garage door spring, gather the following tools and materials:
- Two winding bars (for torsion springs)
- Adjustable wrench
- Socket wrench set
- Vice grips or C-clamps
- Safety glasses and gloves
- Ladder
- Tape measure
- Marker or chalk
- Replacement garage door spring(s) (make sure you get the correct size)

How to Replace Garage Door Spring: Step-by-Step Guide
This guide primarily focuses on how to replace garage door spring for torsion systems since they are more common. If you have extension springs, the process is different, but the basic safety principles still apply.
1. Measure the Old Spring
Before purchasing a new spring, measure the length, wire diameter, and inside diameter of the old torsion spring to ensure you get the right replacement. The door’s weight and size will also determine the spring’s strength, so make sure to buy the appropriate spring for your door.
2. Open the Garage Door and Secure It
Open the garage door manually to relieve the tension on the springs. Once the door is fully open, secure it in place using C-clamps or locking pliers on the tracks just below the bottom roller. This step is crucial to prevent the door from falling while you work.
3. Release the Tension in the Old Spring
For torsion springs, this is the most important and dangerous step. Insert a winding bar into the winding cone of the spring and hold it securely. Use the other hand to loosen the set screws on the cone using an adjustable wrench. Carefully rotate the winding bar counterclockwise to release tension. Insert a second winding bar into the next hole to provide additional control. Repeat this process until the spring tension is fully released.
4. Remove the Old Spring
Once the tension is released, use a socket wrench to remove the bolts that hold the center bracket and the spring in place. Slide the spring off the torsion tube and remove it. If you have a double-spring system, repeat the process for the second spring.
5. Install the New Spring
Slide the new torsion spring onto the torsion tube, making sure it is oriented correctly (torsion springs are typically color-coded: red for left and black for right). Attach the stationary cone of the spring to the center bracket and secure it with the set screws.
6. Wind the New Spring
Winding the new spring requires caution and precision. Insert the winding bar into the winding cone and turn it clockwise to tighten the spring. Most torsion springs require 30 to 36 quarter turns, depending on the door’s specifications. Make sure to follow the manufacturer’s instructions for the correct number of turns. Use the second winding bar to hold the spring in place as you wind it. Tighten the set screws on the winding cone once the spring is fully wound.
7. Test the Door Balance
After winding the spring, carefully remove the C-clamps or vice grips from the tracks and lower the garage door. Check if the door remains balanced halfway open. If it doesn’t, adjust the tension by adding or releasing turns on the spring until the door is balanced.
8. Reconnect the Garage Door Opener
Once the door is properly balanced and moves smoothly, reconnect the garage door opener. Use the remote control to test the door’s operation. It should open and close smoothly without any jerking or strange noises.
Additional Tips for Replacing Extension Springs
If your garage door uses extension springs, the replacement process requires some specific steps for safe and efficient installation. Here are some crucial tips to ensure a successful replacement:
- Remove Safety Cables: Extension springs typically have safety cables running through them to contain the spring if it breaks. Before removing the old springs, carefully detach these safety cables. Make sure to note how the cables are threaded through the springs so you can re-install them correctly later.
- Relieve Tension: Before replacing the springs, ensure the garage door is fully closed. This will relieve most of the tension in the springs, minimizing the risk of injury. You might also consider using C-clamps or locking pliers to hold the door in place on the track as an extra precaution.
- Replace Springs in Pairs: It’s important to replace both extension springs, even if only one is damaged. Springs wear out over time, and a new spring paired with an older one can cause the door to operate unevenly. Replacing both ensures balanced operation, reduces wear on other door components, and extends the lifespan of the new springs.
- Measure Correctly: Ensure you measure the old springs’ length, diameter, and wire size before purchasing replacements. Properly sized springs are crucial for the safe and smooth operation of your garage door. If in doubt, consult the garage door’s manual or a professional.
- Install New Safety Cables: Once the new springs are in place, thread the safety cables through each spring. Secure the cables to the garage frame to prevent them from snapping back if a spring breaks in the future. Properly installed safety cables are essential for safety, as they contain the spring if it fails, reducing the risk of injury and property damage.
- Test the Balance: After installing the new springs, test the garage door’s balance by manually lifting it halfway. It should stay in place without drifting up or down. If it doesn’t, you may need to adjust the tension or verify that the springs are the correct size.
- Lubricate the Springs: Apply a garage door lubricant to the new springs to reduce friction and noise during operation. Regular lubrication also helps prolong the life of the springs.
- Seek Professional Assistance If Needed: Replacing extension springs for garage door repair can be hazardous due to the tension they are under. If you are uncertain about any step of the process, it’s best to consult a professional to ensure the job is done safely.
By following these steps, you can replace your garage door’s extension springs effectively and maintain the door’s safe, balanced operation.

FAQs About How to Replace Garage Door Spring
1. How often should you replace garage door springs?
Garage door springs typically last 7 to 10 years, depending on their quality, usage frequency, and maintenance. Springs are rated for a certain number of cycles (one cycle is the door opening and closing once), usually around 10,000 cycles. For a door that is used four times a day, the springs might last around 7 years. However, if you notice signs of wear, rust, or stretching, or if the door starts struggling to open, it may be time to replace the springs, even if they haven’t yet reached the end of their estimated lifespan.
2. How hard is it to replace garage springs?
Replacing garage door springs can be very difficult and dangerous if you are not experienced with it. The springs are under a significant amount of tension, which can cause serious injury if handled incorrectly. Torsion springs, in particular, require specialized tools and knowledge to safely install and tension them properly. For this reason, it’s highly recommended to hire a professional garage door technician to replace the springs. Attempting to do it yourself can result in property damage or personal injury if not done properly.
3. How to maintain a garage door spring?
Maintaining garage door springs involves regular lubrication and inspection. Apply a silicone-based spray or garage door lubricant to the springs every 3 to 6 months to reduce friction and prevent rust. Avoid using heavy grease as it can attract dirt and cause buildup. Inspect the springs periodically for signs of wear, rust, or gaps in the coils. If you notice any irregularities or hear loud noises when the door operates, it may indicate that the springs need maintenance or replacement. Regular maintenance helps extend the lifespan of the springs and ensures smooth operation.
4. Can you replace a garage door without changing springs?
Yes, you can replace a garage door without changing the springs, provided that the existing springs are still in good condition and rated for the weight of the new door. However, if the new door is significantly heavier or lighter than the old one, you may need to replace or adjust the springs to ensure proper balance and safe operation. It is advisable to inspect the springs when installing a new door to determine if they need replacement based on their age, condition, and compatibility with the new door.
5. Is it safe to adjust garage door springs?
No, it is not generally safe to adjust garage door springs on your own, especially if they are torsion springs. These springs are under extreme tension and can cause serious injury if handled improperly. Adjusting springs requires specialized tools and expertise to ensure they are set to the correct tension. Improper adjustment can result in the door being off-balance, causing it to close suddenly or malfunction. It is best to call a professional garage door technician to make any necessary adjustments safely.
Conclusion
Knowing how to replace garage door spring can save you money and give you the satisfaction of a well-done DIY job. However, it’s crucial to prioritize safety throughout the process due to the high tension in the springs, which can be dangerous if not handled with proper care. By following a comprehensive, step-by-step guide, you can confidently replace your garage door spring and restore smooth, reliable operation to your new garage door.
If you ever find the task too challenging or are unsure about any step, it’s best to consult a professional garage door service to avoid potential risks. For expert assistance, seamless spring replacement, and other garage door services, Royale Garage Door Service, Inc. is here to help. Our experienced technicians ensure safe, high-quality repairs to keep your garage door operating efficiently. Contact us today for all your garage door needs!
End Note
Royale Garage Door Service, Inc. understands the importance of a properly functioning garage door for your home’s safety and security. With years of experience in garage door services, we are committed to providing top-quality repairs and installations. Learn more about us and see what our customers have to say in our testimonials. We offer specialized garage door spring services in Mission Viejo, CA and reliable garage door repairs in Laguna Beach, CA. Explore our service areas, and don’t miss out on our latest specials. Contact us today through our contact us page or get a quote for all your garage door needs!